Hello everyone,
Long post, but a few notes to capture as a Newbie on the build thus far. (Platform and deck done, insulation, heating planned, electrical etc). It is a 16ft platform, which at 200 square feet I am loosely interpreting the building codes as being a storage shed, but mainly because I don't like our city planners, give them enough money, and have a libertarian streak. Budget with yurt and all materials, renting bobcats etc has totaled $14,800. That's about 3k towards the deck and platform, and 11k for the Yurt and heating unit, outlets etc.
New to Yurting, but thought I would share my notes, and eventually photos of my build. I am a father of 4, and we all live at home in Reno NV, with a pretty big house, but seeing as the kids homeschool, our 4,000sq ft house sometimes feels like a two person tent especially as I work from home and am on conference calls. Enter the Yurt.
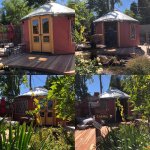
I ordered a 16ft from Pacific Yurts, and it comes next week. For now I will comment on my build experience on the platform and deck. I'm not a contractor, but play one on TV. I know my way around home projects and certainly have done a lot of work on our home including all trades.
Excavation:
In our 1/2 acre lot the area for the Yurt gets runoff, and can get wet with soil of a high clay content. First task was renting a bobcat and excavating 2-4 feet down to the base DG bedrock of sorts. This was a messy job, but It allowed me to place cement blocks from Lowes with built in metal straps. I used 16 blocks per Pacific Yurts plan, and all beams and joists were 2x6 pressure treated. Each concrete block got 1-3 bags of concrete. Placing a bag dry at the bottom of the hole helped create a way to easily level blocks. Put a block on the like of dry, and pour another bag around the block. Then, you just lift the side to level the block. It was very helpful to have level blocks. posts were tied to beams with metal straps. Then 8 yards 4 minus rock brought in. That rock made a very nice appearance for the base of the Yurt, and can help significantly with drainage.
Platform:
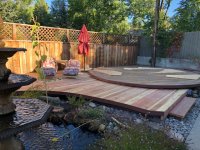
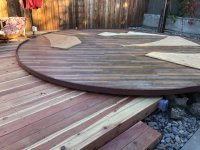
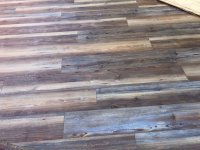
The platform went well, and I strung a string with a bubble level, and worked from this center line to help level each beam. I used 4x6 Pressure treated. I used weed fabric to staple to the bottom of each beam and added 4x4 blocking. The weed fabric allowed a support for R19 fiberglass insulation. I put the paper facing down, and then used expanding gap and crack spray foam everywhere the insulation touched a beam, blocking, or its neighbor. This created a very uniform insulation that to me seems like it will breathe, but be very good. There is about a 1-3 inch void between the top of the insulation to the 1& 1/8" plywood T&G subfloor. The subfloor was glued and screwed down. I left the platform with the plywood pre cut in squares, but scribed a circle from the center. I then laid engineered wood floor and when complete scribed another circle, and made one final cut. For the drip edge I bought some Tree plastic / deck edging. It is 4" and bent easily but will never need paint. I then used a brown silicon to seal the floor to the drip edge. In the end I think it looks pretty great. I'll upload some photos. I will be using large stones on site and mortar to create a rock wall as a wind barrier around the platform on top of my new rock/gravel base.
Deck;
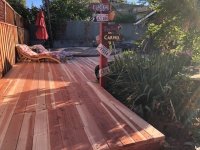
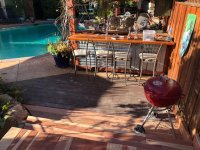
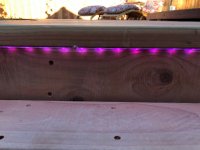
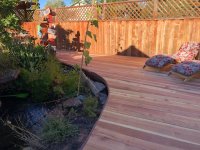
I love redwood, and all of my decks are redwood, so that was the wood of choice. My Yurt platform floor sits at about 15" from grade, and thus the deck was made as a freestanding structure with the decking sitting 3 inches lower, thus yielding two steps to the deck. Meaning ground, step and then deck. This worked out well. I ran the deck boards several inches under the yurt platform edge, and I think it looks integral. My father recommended running the redwood boards tight together, and after they dry out for a season they will have a nice 1/4" gap. I had done that on other decks, and it not only looks great after seasoned, but is much faster to lay without worrying about spacing. The deck has LED light strips, currently red in color that makes the deck / yurt seem a bit like a UFO landing. more on LED's below.
Power: I ran an underground conduit from the house panel to the Yurt and will attach it to the house for power. I decided to wait on outlet placement until the Yurt is complete. I plan to use outdoor outlets conduit and boxes painted to match the interior white 14" off the ground, probably in three areas.
Lighting / Heating.
I have several amazon echo devices, and have been playing with many of the new outlets and switches that are wifi based, but Alexa controlled. This will allow for all lights and certain outlets to be voice controlled. I found some of the great LED light strips that are wifi voice enabled, and remote with any color combination you select. I plan to uplight the roof from a few wooden strips on four of the roof rafters. Link to LED's here. They are really cool, and easy to group together, control by remote, switch, and voice control. I don't have to be home to control. https://www.amazon.com/gp/product/B07C1H1Q9N/?psc=1&tag=worldwidecreatio
As for heating I ordered a mini-split unit that will be dedicated to the Yurt, and plan to install myself. for about $1000 that will include a wifi control unit, such that I can set the temp by voice, put on a schedule or control remotely via cell phone if traveling and want to change the yurt temp. My goal is that all yurt features can be remote controlled via voice, within the main house, yurt, or remotely via cell phone app. https://www.amazon.com/dp/B01DVW6G06/?&tag=worldwidecreatiopsc=0 and the remote https://www.amazon.com/dp/B07B46L3X8/?&tag=worldwidecreatio
Cheers, more to come!!

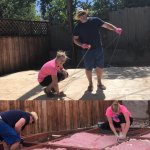
Long post, but a few notes to capture as a Newbie on the build thus far. (Platform and deck done, insulation, heating planned, electrical etc). It is a 16ft platform, which at 200 square feet I am loosely interpreting the building codes as being a storage shed, but mainly because I don't like our city planners, give them enough money, and have a libertarian streak. Budget with yurt and all materials, renting bobcats etc has totaled $14,800. That's about 3k towards the deck and platform, and 11k for the Yurt and heating unit, outlets etc.
New to Yurting, but thought I would share my notes, and eventually photos of my build. I am a father of 4, and we all live at home in Reno NV, with a pretty big house, but seeing as the kids homeschool, our 4,000sq ft house sometimes feels like a two person tent especially as I work from home and am on conference calls. Enter the Yurt.
I ordered a 16ft from Pacific Yurts, and it comes next week. For now I will comment on my build experience on the platform and deck. I'm not a contractor, but play one on TV. I know my way around home projects and certainly have done a lot of work on our home including all trades.
Excavation:
In our 1/2 acre lot the area for the Yurt gets runoff, and can get wet with soil of a high clay content. First task was renting a bobcat and excavating 2-4 feet down to the base DG bedrock of sorts. This was a messy job, but It allowed me to place cement blocks from Lowes with built in metal straps. I used 16 blocks per Pacific Yurts plan, and all beams and joists were 2x6 pressure treated. Each concrete block got 1-3 bags of concrete. Placing a bag dry at the bottom of the hole helped create a way to easily level blocks. Put a block on the like of dry, and pour another bag around the block. Then, you just lift the side to level the block. It was very helpful to have level blocks. posts were tied to beams with metal straps. Then 8 yards 4 minus rock brought in. That rock made a very nice appearance for the base of the Yurt, and can help significantly with drainage.
Platform:
The platform went well, and I strung a string with a bubble level, and worked from this center line to help level each beam. I used 4x6 Pressure treated. I used weed fabric to staple to the bottom of each beam and added 4x4 blocking. The weed fabric allowed a support for R19 fiberglass insulation. I put the paper facing down, and then used expanding gap and crack spray foam everywhere the insulation touched a beam, blocking, or its neighbor. This created a very uniform insulation that to me seems like it will breathe, but be very good. There is about a 1-3 inch void between the top of the insulation to the 1& 1/8" plywood T&G subfloor. The subfloor was glued and screwed down. I left the platform with the plywood pre cut in squares, but scribed a circle from the center. I then laid engineered wood floor and when complete scribed another circle, and made one final cut. For the drip edge I bought some Tree plastic / deck edging. It is 4" and bent easily but will never need paint. I then used a brown silicon to seal the floor to the drip edge. In the end I think it looks pretty great. I'll upload some photos. I will be using large stones on site and mortar to create a rock wall as a wind barrier around the platform on top of my new rock/gravel base.
Deck;
I love redwood, and all of my decks are redwood, so that was the wood of choice. My Yurt platform floor sits at about 15" from grade, and thus the deck was made as a freestanding structure with the decking sitting 3 inches lower, thus yielding two steps to the deck. Meaning ground, step and then deck. This worked out well. I ran the deck boards several inches under the yurt platform edge, and I think it looks integral. My father recommended running the redwood boards tight together, and after they dry out for a season they will have a nice 1/4" gap. I had done that on other decks, and it not only looks great after seasoned, but is much faster to lay without worrying about spacing. The deck has LED light strips, currently red in color that makes the deck / yurt seem a bit like a UFO landing. more on LED's below.
Power: I ran an underground conduit from the house panel to the Yurt and will attach it to the house for power. I decided to wait on outlet placement until the Yurt is complete. I plan to use outdoor outlets conduit and boxes painted to match the interior white 14" off the ground, probably in three areas.
Lighting / Heating.
I have several amazon echo devices, and have been playing with many of the new outlets and switches that are wifi based, but Alexa controlled. This will allow for all lights and certain outlets to be voice controlled. I found some of the great LED light strips that are wifi voice enabled, and remote with any color combination you select. I plan to uplight the roof from a few wooden strips on four of the roof rafters. Link to LED's here. They are really cool, and easy to group together, control by remote, switch, and voice control. I don't have to be home to control. https://www.amazon.com/gp/product/B07C1H1Q9N/?psc=1&tag=worldwidecreatio
As for heating I ordered a mini-split unit that will be dedicated to the Yurt, and plan to install myself. for about $1000 that will include a wifi control unit, such that I can set the temp by voice, put on a schedule or control remotely via cell phone if traveling and want to change the yurt temp. My goal is that all yurt features can be remote controlled via voice, within the main house, yurt, or remotely via cell phone app. https://www.amazon.com/dp/B01DVW6G06/?&tag=worldwidecreatiopsc=0 and the remote https://www.amazon.com/dp/B07B46L3X8/?&tag=worldwidecreatio
Cheers, more to come!!
Last edited by a moderator: